Recipe: Easy Sausage Frittatta

Frittattas like Pizza, are among Italy’s most popular and humble dishes, a classic “poor people’s” food that would allow to create a more well-rounded meal by utilizing whatever was left in the pantry and then adding some eggs and flour. A frittatta base is always the same, it’s fast to make and very lowcarb (for those who are trying to cut down on carbs in their diet) or alternatively vegetarian.

Today, I had some leftover pork sausages from the local market as well as eggs, onions and leek in the fridge. The obvious thing was to make a tasty frittatta! There’s little you cannot use in a frittatta….icecream, maybe?

~ Easy Frittatta Recipe ~
(for 2 people as a main dish or 4 as a side)

  • 5 small eggs
  • 4 small sausages
  • 1 big onion, 1 small leek stalk
  • ~2dl milk
  • Olive oil, salt, pepper, herbs
  • All-purpose flour

Cut the meats and vegetables into small cubes or strips and stir-fry in olive oil until golden. Use an iron skillet or frying pan with at least a 2cm high rim to hold the rising frittatta.

frittatta01In a separate bowl, first whisk some milk with 1 table spoon of flour. Add the eggs and whisk further until even consistency is achieved. Add salt, pepper and herbs to taste. I like using chives or dill, oregano or herbs de provence depending on the frittatta.

frittatta02Douse the stiry-fry with the egg mix and put a lid on for approx. 10mins at medium to high heat. If the frittatta isn’t rising, increase heat. Lay a plate on top of the frittatta inside the pan, to turn it around and let the other side get some heat for another 3 minutes. The frittatta will rise considerably after you flipped it around.

frittatta03Cut the frittatta in quarters and enjoy with some sour cream, chutney or chlli flakes on top! Bon apetito!

frittatta04

Review: Blue Apron

I was pretty skeptical about Blue Apron. Some friends who subscribed to the service spoke highly of it, praising the tasty recipes and easy prep. But me, I’m a foodie. I like cooking, although I’m not really a fan of going to the grocery store or making anything elaborate at the end of a long work day. Not only that, I’m good at cooking. Could Blue Apron possibly provide anything that I couldn’t do myself?

When a friend offered me a free trial for a week, I figured I should give it a shot for science as much as anything else. One week means three meals for two people, usually one fish dish and two meat items (unless you request the vegetarian menu). When that first box arrived, my partner and I gathered around, excited for the unboxing and to learn what we’d be having for dinner that night.

Opening the Blue Apron box...

Opening the Blue Apron box…

The box itself is extremely well packed. Produce and grains appear at the top of the box in easy-tear bags with the perfect serving size, while meat and fish are at the bottom with the cold gel packs. All of the produce looked fresh, and everything was accounted for.

Our box bounty

Our box bounty

As someone with some technical writing experience, I can say with confidence that Blue Apron’s recipe cards are put together well. Each one starts with the mis en place, and they encourage you to save on dishes where possible and use your time effectively. I did find that each recipe would take 15 – 20 minutes longer than listed, although I’m sure that’s in part because I’m a slow chopper.

mis en place

mis en place

The final results were pretty true to the recipe card as well. Here is Blue Apron’s professional photo of salmon with sorrel:

blue_apron_salmon

And here is my actual final result from my first-ever recipe:

20150527_202725

The first box made us cautiously optimistic, so we decided to subscribe for a few more weeks. What my partner and I discovered over time is that even though we’re foodies with professional chefs in the family, we actually learned some new techniques and picked up some new ingredient ideas from the Blue Apron recipes. At least twice now one of us has said, “let’s make X for dinner, like that Blue Apron meal from a few weeks ago”.

Now, we have definitely added our own twist on some of their pre-packaged spice blends, and I include about twice as much vinegar or mustard as their recipes say because we like intense flavor. But even for a couple of know-it-alls in the kitchen, Blue Apron has turned out to be an excellent service. We save time during the week and never have to play the “what are we eating for dinner” game. The food is legitimately tasty and often interesting to prepare, and $10 per meal is a good price for what the service offers.

If you’ve been wavering, I highly recommend finding a free week coupon and checking it out yourself! You, like us, might be pleasantly surprised.

Mason Jar Salads: the perfect workday lunch

Lately I’ve been trying to eat healthier and watch my wallet a little more. For the most part this has been pretty smooth, except for the danger zone that is workday lunches. You know how it goes: you’ve been working hard on a project, your post-lunch meeting just got moved up, and suddenly you find yourself spending $10 on fast food because you’re starving and have no time.

Bringing lunch from home is a great idea, except then you have to find time every night to plan and make your lunch. I take a small bag to work, and there isn’t a lot of room for bulky food items. And man, I’m going to be pretty sad if I get to work and find out that my laptop got covered in leftover chili!

Fortunately I discovered Mason Jar Salads, and they’re perfect. When prepared properly, you can make them all at once on a Sunday night and have them ready to go throughout the week. Mason Jars are compact and prevent any dressing explosions, and they fit easily into my bag. Most importantly.. they’re delicious!

The key to this Salad is stacking your ingredients in the correct order. You put in the dressing first, making sure it doesn’t splash up the sides of the jar. Then put in hard veggies like carrots or cucumber. Next, stack your protein(s). Finally, greens go at the very top. By stacking this way, you keep your greens nice and crispy!

When you’re ready to eat, just shake the jar vigorously to dress everything evenly and open it up.

A few tips:

  1. If you’re cooking your protein, let it cool first before putting it in the jar to prevent condensation.
  2. Use a wide-mouth Mason Jar for easier eating.
  3. Use a canning funnel (if you have one) to easily get the dressing in the jars without touching the sides.

Here are a couple of Mason Jar Salads that I made recently:

chicken ranch mason jar salad

This salad has cucumber, carrots, roast chicken, chopped up bacon, and romaine lettuce with a homemade buttermilk ranch dressing.

asian mason jar salad

This salad has cucumber, carrots, fried tofu, and (undressed) coleslaw mix with a sesame oil and vinegar dressing.

What would you stack in your Mason Jar Salad?

Food Loathings

Everyone has a food nemesis or several. I grew up with a lot of different food and generally think myself a very open-minded eater. Whenever I travel to another country, I try everything at least once. There’s a few things I really can’t abide though and not for lack of trying!

1. Spawn of the seven perfumed hells: Fennel

Fennel is the absolute worst and needs to die in a dark corner surrounded by starving rabbits. It really is rabid food and more power to them – it smells like stingy grandma perfume and ruins every salad. Steamed or cooked to death fennel is still half-vile and only tolerable underneath a thick coat of sauce béchamel and cheese (usually gratin). I want to forget everything I ever had to do with fennel.

cilantrohell

Monstrous cilantro

2. Satan’s soapy brother: Cilantro / Coriander (fresh)

My first real Cilantro encounter happened with Mexican food in California. I was hungry and super psyched about nachos with salsa in a restaurant in Monterrey, only to find the fresh tomato flavor disgustingly disturbed….by soap! WHAT IS THIS MADNESS?? WHYYY??……………….Anyway, I recently learned it’s a genetic thing (or maybe some tastebuds are just broken), in any case no Cilantro for me, kthxbai! This is why Thai curry > Indian curry.

3. The squishy gnomes: Mushrooms

Okay this is where I feel a little ashamed because mushrooms are considered a delicacy almost anywhere in the world and they’re certainly a great source of protein. It’s just that I can’t stand them and I’ve tried a lot of varieties. Also, fungus IS kinda nasty if you think about it, I mean it even eats people! …..

The earthy flavor and slimy texture of some mushrooms gives me cold sweats. Am okay with morel cream sauce but anything else is torture.

4. Garbage from the Ocean: Seafood (and sushi)

I love cooked fish – seabass, trout, salmon, tuna, you name it. I’ll eat cold fish in salad or a sandwich. Fish is healthy and full of omega-something-trendy and we’ve still got about 30 years to go before we’ve completely rid the oceans of all of them. Everything that ain’t fish however is disgusting and should remain in the water. Shrimps are spongy little monsters trying to facehug you when you’re not looking, mussels are pandora’s box and squid would better serve as a hairband. Go away seafood!

panicfood

What seafood looks like to me

5. The wicked sisters: Anise, Licorice and Cumin

None of these should be allowed anywhere near food that isn’t a Christmas cookie. Nuff said.

6. More’s the pity: Bell peppers / paprika

I like the taste of paprika! I wanna eat it on pizza or as stuffed dolma with wonderful secrets inside! But here I am outwitted by fate because for whatever reason, peppers don’t sit well with me at all, especially raw ones but cooked ones too. Not going into any details here, mostly I get stomach cramps for the rest of the day. I have an anti-pepper digestive track or something, screaming <INTRUDER ALERT!> every time I give it a try.

***

It’s funny how that works with food we don’t enjoy or can’t stomach. Real allergies aside, I remain convinced it’s a psychological thing – many (not all) of the foods we hate were likely also avoided by our parents (or whoever cooked for you) or simply not served in our home and immediate environment. I mean, I doubt I’d hate mushrooms if I was a wild boar.

That reminds me, I didn’t like tomatoes as a kid either but somehow I acquired a taste for them. They’re a good excuse to eat all the mozzarella. Is there any food you’ve tried over and over and still can’t take or are you an easy food adopter?

Pizza! For When the Busy Takes Over.

Hey folks, it’s been awhile since I posted here, hasn’t it? I had to take a break from blogging about food in order to grow some! Late April to early June is prime time in our garden, when the seedlings start growing into actual plants and lots of care is needed to make sure they become strong and healthy.  So far, so good as far as all that goes. And with all the good that has been going, meal time has become something of a challenge, especially on the weekends when we do most of our garden work. After being out in the yard all day, the last thing we want to do is cook.

This is where pizza comes in.

I love pizza. You love pizza. We all love pizza! And homemade pizza gets lots of love in our house, partly because it’s so easy to manage when we’re bone tired. And while you can’t go wrong with the basics – tomato and cheese, pepperoni and sausage, pepper and onion, etc., sometimes it’s nice to branch out into other flavor territories. So here are a couple recipes that we came up with when more than the basics are required: Buffalo chicken white pizza and artichoke, sun-dried tomato, and feta pizza. (So delicious, both!) I’ve also included a sauce recipe that’s become a staple whenever fresh tomatoes are not available. Either recipe can be made on the pizza crust of your choice — fresh, pre-made, flavored, wheat, white — the sky’s the limit! Cooking the pizza is up to you, whether you use a pan, pizza stone, or are maybe lucky enough to have a pizza oven. For our usual setup of individual pan pizzas, I cook the crust alone first for about 10 minutes at 375-400 degrees. Then I take the pizzas out of the oven, add the toppings, then put them back in for 13-15 minutes.

**********

Semi-homemade pizza sauce

  • 1 can of diced tomatoes with basil, oregano, and garlic (If you like a lighter sauce, only drain the tomatoes slightly. Drain fully if you want a thicker sauce.)
  • 1 teaspoon dried basil
  • 1 1/2 teaspoons oregano
  • 1/2 teaspoon garlic powder
  • 1/4 teaspoon salt
  • dash of ground pepper
  • 1/2-1 tablespoon agave nectar (Recommend the agave over white sugar as it mixes better, but you could use white sugar. Go with a smaller amount of sweetener at first and add more to taste.)

Blend all ingredient together using a blender or stick blender. Let rest for about 30 minutes prior to using to let the dried herbs soften up a bit. Recipe makes enough for 2 large pizzas.

**********

Buffalo chicken white pizza

Ingredient list:

  • chicken (white and/or dark meat, whatever your preference)
  • flour
  • egg white
  • water
  • panko or white bread crumbs
  • corn meal
  • salt
  • pepper
  • oil, sliced or diced
  • butter
  • hot sauce
  • garlic powder
  • onions
  • whole milk mozzarella cheese (really, don’t skimp on the cheese! A little goes a long way.)

For buffalo chicken, cut up chicken into strips about an inch wide. Coat in flour, then dip into a mixture of 1 egg white and 1 tablespoon of water, then coat with a mixture of panko, corn meal, salt, and pepper. Fry chicken strips in about 1/2-inch of oil over medium heat, about 4-6 minutes per side or until golden brown. Drain chicken on paper towels and let cool.

For the buffalo sauce – whisk together 1/2 cup of melted butter and 1/2 cup hot sauce. (Can adjust to taste.)

One chicken is cool to the touch, cut into small chunks and place in a ziploc bag. Pour in a enough buffalo sauce, and shake everything around, so that it liberally covers the chicken. (You’ll want to have enough sauce left over for two drizzles over the pizza.)

Also saute or caramelize the onions.

For garlic butter sauce, in a small container with a lid, add 2 tablespoons of melted butter and 2 teaspoons garlic powder. Put lid on a shake vigorously.

Prepare pizza: Brush garlic butter on crust. Sprinkle with shredded mozzarella cheese. Add chicken and onions. Drizzle a little buffalo sauce over the top. Cook until crust is golden brown. Drizzle a little more buffalo sauce over pizza before serving.

**********

Artichoke, sun-dried tomato, and feta pizza

Ingredient list:

  • artichoke hearts, quartered and marinated
  • sun-dried tomatoes (dry packed, not the ones in oil)
  • feta cheese
  • whole milk mozzarella cheese.
  • semi-homemade pizza sauce

Throw the sauce and cheeses on your pizza crust. Cut up a desired amount of artichokes and sun-dried tomatoes, and place liberally on top. While cooking, you may want to keep an eye on the pizza as sun-dried tomatoes have tendency to burn. (P. S. If you happen to like black olives, they work well on this pizza, sliced and in small quantities. Too many and it gets too salty.)


While Cary’s happy to talk food here, she’s also pretty good at doling out words about video games at United We Game while simultaneously maintaining her own blog, Recollections of Play. You can also find an archive of fun, geeky articles from her and like-minded souls at Geek Force Network.

Farmers Market Fresh: Clam and Corn Chowder

Spring is finally arriving in North America, and the end of April means the beginning of the Farmers Market season in a city near you.

If you have even the faintest love of food, it’s hard to not be inspired by a Farmers Market. A good Market has rows of booths representing locally owned farms, bakeries, butchers, and even vineyards. The exact contents of each booth vary from region to region, and it’s not always the cheapest place to buy ingredients (although it can be for certain items).

farmersmarket

Instead what you go to a Farmers Market to find is unusual ingredients and high-quality local produce that was literally in the ground the day before. You go for the atmosphere, to be part of a crowd that loves fresh food. You go for the buskers playing music and the cute dogs happily sniffing the air and that amazing authentic tortilla place on the end of the row that is giving out free samples.

If you haven’t been to a Farmers Market before (gasp!) here are a few tips:

1) Bring cash. A lot of the smaller booths don’t take cards, and they would prefer cash anyway for the lower processing fees.

2) Bring a tote bag to carry around your haul. Keep in mind that some of the produce will be dirty or can stain (beets, I’m talking to you) so you don’t need anything fancy.

3) Plan to go back again soon! The offerings at the Market will change throughout the growing season. Here in the Pacific Northwest we start out with strawberries and winter greens in mid-April, and end the summer with piles of fresh peaches and beets.

Yesterday was my first Market trip of this year and we came home with an impressive haul: pea shoots, garlic greens, tarragon, fresh clams, half a dozen duck eggs and a dozen chicken eggs, and full-sour dills and spicy kimchi from my favorite local fermentation pickler.

I was inspired to make a clam and corn chowder with a little help from the supermarket, and it turned out great. My recipe is below but what I want to know is: what inspires you at the Farmers Market?

————————————————————

Clam and Corn Chowder
feeds 4 as the main course

Ingredients

2lbs of fresh clams
4 ears of corn
3 strips of bacon — the smokier the better
half a yellow onion
a large shallot
1lb of new potatoes
2 tablespoons of butter
1/2 cup of water
1 bottle of clam juice
1 cup white wine
1 can diced clams
1 cup of buttermilk
1/2 cup heavy cream
2 tablespoons of corn starch
a big handful of fresh tarragon
pinches of dried thyme, smoked paprika, cayenne pepper, salt, black pepper

food1

Directions

  1. Boil some water in a large pot. Throw the cleaned ears of corn in for about 5 minutes, then remove and run under cold water. Set them aside to cool. Clean out the large pot for later use.
  2. Get chopping! Chop the potatoes into bite-sized pieces and finely mince the onion and shallot. Use a knife or scissors to cut the tarragon into pieces.
  3. Cut the bacon into small strips length-wise, about half an inch wide. Throw them into the large pot on medium-high heat. Cook the bacon until it starts to render, but not too crispy.
  4. Add a tablespoon of the butter, the onion, the shallot, the tarragon, and the dried spices. Stir and cook until clear, about three minutes.
  5. Add the potatoes, clam juice, can of clams, and wine. Bring the mixture to a boil.
  6. In your measuring cup, add the corn starch to the water and mix until blended. Add it to the boiling pot.
  7. Wait until the potatoes are mostly cooked, about five minutes. You can use this time to cut the kernels off of the corn cobs.
  8. Add the fresh clams. Leave the pot uncovered and still boiling.
  9. After about four minutes, add the corn. Wait another four minutes. (Note: Do not eat any clams that have not opened after 8 minutes of cooking.)
  10. Take the pot off of the hot element and wait until it is no longer boiling but still very hot.
  11. Add the final tablespoon of butter, the buttermilk, and the heavy cream. Stir everything together and let it sit for a minute or two to heat up.
  12. Serve! Put out a dish for the clam shells and serve with sourdough bread and a glass of leftover white wine.

food2

Want the Perfect Iced Coffee? Try Cold-Brewing.

ColdBrew_7-614x293

In my neck of the sorta-northern U. S. woods, it’s common to see the flip flops come out when the outside thermometer reaches 60 degrees. While I don’t follow this particular footwear routine, I do have a similar mantra concerning weather and coffee: “60 degrees means iced coffee!”

But the thing about iced coffee, as obtained from a proper coffee establishment, is that it’s expensive. Maybe I’m overly thrifty, but having to pay up to a dollar more to have someone add ice to a cup of coffee is perplexing. So over the years I’ve tried to make my own…without much success. I tried brewing my normal coffee, letting it cool, and adding ice, but that never cut it. The coffee always ended up tasting weak and watered down. I tried brewing exceptionally strong coffee – espresso and French roasts. The results were better, but since I’m not a fan of dark roasts generally, I never found the tastes of these brews appealing. I tried k-cups that were supposedly designed to make iced coffee. They weren’t. (Quite the sham they are.) I eventually gave up on the notion of ever making great iced coffee at home. That is until I discovered cold-brewed coffee.

As I’ve come to discover, cold brewing produces an amazing cup of coffee. The process removes much of coffee’s inherent bitterness and acidity and leaves you with coffee that’s rich, bold, and very smooth. Best of all, because the resulting coffee is so concentrated, it requires some dilution, which occurs anyway with iced coffee, what with all the melting ice. Despite this, the taste remains as wonderful as a full-strength cup o’ joe.

The Internet is full of recipes for cold-brewed coffee/iced coffee, and here’s one more. It’s so very simple, if a little time consuming. Fair warning, my recipe here is specifically based on using an 11-ounce bag of ground coffee, the size of which is most prevalent in my grocery stores. (A good bit of trial and error was involved here as a lot of recipes call for 10 or 12 ounces of coffee, and you’d be surprised how much that makes a difference in the final results.)

The perfect cold-brewed iced coffee

For the coffee concentrate:
  • One 11-ounce bag of course ground coffee
  • 6 2/3 cups of cold water
  • A fridge-safe container large enough to hold 7-8 cups
  • Another fridge-safe container that holds at least 1.5 quarts
  • For straining, a fine mesh sieve, cheesecloth and/or coffee filters
  • A funnel

In a sealable container (one that’ll fit in your fridge and hold at least 8 cups), pour in the ground coffee and then the water. Stir the mixture until all the grounds are incorporated. (If you’re using a bottle-type container, shake vigorously, with the cap on, of course.) Put the container in the fridge and let it rest for at least 10 hours but not more than 14. (I’ve read that this time frame is the optimal. I’ve not tried it longer for longer than 14 hours – too scared to waste more coffee than I already have!)

After brewing, it’s time to strain out the grounds. Line your sieve with 1-2 coffee filters or several layers of cheesecloth, place it in the top of properly sized funnel, and then place your funnel into whatever container will hold the concentrate. Working in small batches, and replacing the filters or cheesecloth when needed, strain the concentrate from the grounds into the new container. (With waiting for a batch of liquid/grounds to strain out, this process took about 45 minutes, and I came away with about 1.25 quarts of concentrate. Your results may vary.)

To make iced coffee:
  • 1/2 cup of liquid gold, i.e. the coffee concentrate
  • 6 ounces of cold water
  • 1-2 ounces of cream, half-and-half, or milk
    (If you like your coffee sweet, a dash of simple syrup would do the trick.)

Pour all the ingredients into a tall glass filled with ice, stir, and enjoy. If my ratios don’t work for you, simply adjust the dilution. Once you have the concentrate made, the rest is really up to your taste buds!


While Cary’s happy to talk food here, she’s also pretty good at doling out words about video games at United We Game while simultaneously maintaining her own blog, Recollections of Play. You can also find an archive of fun, geeky articles from her and like-minded souls at Geek Force Network.

Recipe: Delicious Shortbread with Strawberries and Whipped Cream

Shortbread is the food of the gods. This easy to bake, deliciously addictive, buttery and crumbly biscuit may be Scotland’s greatest vindication where cuisine is concerned. Traditional shortbread is made of nothing but awesome butter, sugar and flour and will save your ass when facing a sudden onslaught of uninvited guests. To go the extra mile, add fresh strawberries and whipped cream to make this an unforgettable dessert experience!

~ Basic Shortbread Recipe ~
(for about 30 or so biscuits)

  • 300g plain white flour
  • 200g butter (unsalted)
  • 100g white sugar
  • small pinch of salt
  • optional: some liquid vanilla extract

Add all ingredients in a bowl and knead with your bare hands until the dry crumbly mass sticks together. Roll the dough (I prefer 5-6mm for thickness but no less than 3mm) and cut into whatever shape you prefer. I’m lazy, so I do uneven squares.

Place on the baking sheet and bake for 15-20mins at 180°C. Once the biscuits start turning a dark golden around the edges, remove from the oven and leave on a cooling rack for at least 15mins.

shortbread02

We already ate a few…

This is where you’re done with the basic shortbread recipe – but we’re just halfway! For divine foodgasm, slice up some fresh strawberries and give them a nice tumble with a bit of powder/icing sugar in a bowl. Next, whip up some cream until light and fluffy.

~ How to serve ~

I like to do three layers of biscuits (still slightly warm after baking) per person or serving. Use a small dessert bowl and start off with some strawberries on the bottom. Break one biscuit in half (or quarters depending on size) and then cover with a spoonful of whipped cream. Rinse and repeat until you’re satisfied with the quantity. Always finish with cream and strawberries on top.

Congratulations – you have officially entered shortbread heaven! OMNOMNOM

shortbread

Fair warning: guests will be back for more.

I Ate This: Eat Well Embrace Life Sweet and Spicy Black Bean Hummus

To know me is to know that I could easily live off nothing but crunchy things with soft dips. Tortilla chips and salsa, Fritos with cheese dip, wavy potato chips with French onion, melba toast and spinach/artichoke dip…yum, yummy, and yummiest! But outweighing all of those dips is the king of ’em all – hummus. Give me a container of hummus and something crunchy – carrots, pita chips, multigrain crackers – and you’ve got yourself a very happy camper. And I thought I knew all there was about hummus until one fateful day when my husband informed me of a hummus so unbelievable, so fantastical that I completely thought he was making it up.

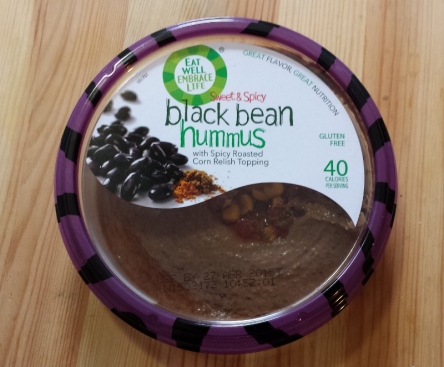
Black bean hummus with corn relish.

How did he come across such a magical-sounding concoction? A friend at work who brought said (completely fabricated?) mixture to share with his unsuspecting co-workers. After trying it, my husband raved and made the utterly firm statement that my life would not be complete without trying it too. Having never heard of said “black bean hummus” (if it even existed), I queried as to where one could get such ridiculousness. The answer came in the form of Wal-Mart. Ah-ha! We have one of those! And so I went. However, as I discovered, our local, regular-sized Wal-Mart with a pitiful “grocery” section had nothing in the way of hummus, regular or special. The disappointment was swift. So my husband bartered with his co-worker to obtain a container post haste. And eventually, this container of what I will shortly describe as pure ecstasy for the palate made it in our house.

Want. NAOW PLEEZ!

Folks, I’m going to level with you. If you like hummus, if you like bean dip, if you like food that makes your head and heart swoon in joyous rapture, I urge…nay, demand! that you to seek out Eat Well Embrace Life’s Sweet and Spicy Black Bean Hummus. Know first and foremost that it is spicy, and it is sweet, and it is all delicious.

(Seriously, I literally want some right now and it’s just downstairs in the fridge and it’s all I can do to continue typing this but as soon as I’m done it’s all about the black bean hummus and there are no punctuation marks in that!)

But let’s get real for a moment. Why exactly is Eat Well Embrace Life’s Sweet and Spicy Black Bean Hummus superior in all ways to regular hummus? Well, it’s not…not really. For one, it’s not a replacement for regular hummus at your Greek or Middle Eastern meals. For those you totally want to stick with the real thing, which is magically delicious no matter how you spice it. Plus, it’s definitely got a little heat to it, so if you prefer the mild, then you might want to try Eat Well Embrace Life’s Tuscan White Bean Hummus. (Which, of course, I had to try once I found it. Bottom line: really tasty but not as quite as tasty as the black bean hummus.)

As a dip for crunchy things from both man and nature, this black bean hummus really, truly is just about the best thing going in our house at the moment. It’s thick like hummus, and has a smooth yet textured finish also like hummus. It tastes very much like what you might expect from a black bean dip — rich, earthy, and slightly smoky — except there’s that hint of heat in the background, a little peppery like hot sauce. Plus, it contains tahini like regular hummus, so there’s a slight sesame aftertaste that’s not at all terrible. Its crowning achievement though is the corn relish that resides in a ring in the center of the hummus. If you chose to scoop some of it as well (and why wouldn’t you?), you’re greeted with the sweet tastes of corn, pepper, and light fruitiness. It’s an enveloping mélange that beautifully compliments the heady hummus itself. The whole thing is so dangerously delicious that it’s easy to polish of an entire container in one sitting. And that’s one person not sharing. Try this hummus and you’ll find that you want to sing its praises with a side of “get your own!” as well.

Okay, okay, I’m gushing…a lot. So let me see if I can come up with any downsides to this hummus… Um…uh… Huh. Wait! Got one. Like with regular hummus, sometimes you’ll get a container where the oil has separated a little from the mixture. It’s not visually appealing, but a quick stir will take care of it. And if that’s the worse thing about this hummus, then maybe “worse” needs a new definition.

A couple months ago, my hummus habit completely changed when I discovered that, while the Wal-Mart provided to be only a letdown in regards to its hummus neglect, one of my local grocery stores in fact carried this delectable treat. I’ve since tried Eat Well Embrace Life’s other types of hummus, but I always return to the one and only Sweet and Spicy Black Bean. I haven’t gone back to regular hummus for snacking, and I don’t think I can at this point. The deed is done and there is no turning back.


While Cary’s happy to talk food here, she’s also pretty good at doling out words about video games at United We Game while simultaneously maintaining her own blog, Recollections of Play. You can also find an archive of fun, geeky articles from her and like-minded souls at Geek Force Network.

Recipe: Seasoned Wild Rice with Tomato & Cucumber Salad

Lately I’ve been going back to the home-cooking of my childhood and some of my favorite recipes are all about the rice. Wild rice mix is a very satisfying option to plain white rice but it screams for color and flavors. For some reason I always loved acidic and vinegary combos with wild rice, so this is one easy and quick recipe to preparing a rice dish for yourself that’s both wholesome and very tasty!

~ Ingredients ~
(serves 2 people)

  • 375 grams of wild rice mix
  • 7.5dl vegetable stock / bouillon
  • 1 big carrot
  • 1 small onion
  • 2 red tomatoes
  • 1/2 of a (Nostrano) cucumber
  • Olive oil, white vinegar, slice of lemon

salad

First off chop the onion, tomatoes and cucumber into small, same size cubes. I prefer Nostrano cucumbers for taste and less kernels but any salad cucumber works (I also remove the gooey kernels from the tomatoes). Mix everything in a bowl and add some olive oil, vinegar and a squeeze of fresh lemon. Put the salad aside to rest, ideally for about 30mins.

rice01

Bring your vegetable stock/bouillon to a boil while chopping the carrot into very small cubes. Add the wild rice and carrots and lower to medium temperature. Let the rice cook for ~20mins with only an occasional stir. Add a flake of butter before serving next to the tomato and cucumber salad. Enjoy the flavor combination of the sweet rice with that very fresh salad!

rice02